
Textile Workshop @ Home: from old stool to design piece
Do you have an old chair or a stool at home that could use a makeover? Turn it into a design piece with this Textile Workshop @ Home! This workshop is for everyone, please note that you need a few hours to master the technique
Workshop and design: @SteveCromsigt (Instagram); SteveHandwoven (Facebook). Check out her page for more inspiring weave designs.
Gather the following supplies:
- Stool or chair from which you can remove the seat (tip: if you don’t have one at home, get one at the thrift shop)
- Rope / cord
- Comb/weaving comb
- Staples tagger
- Scissors
- Ruler
- Graph paper and pencil
- Thick crochet hook (optional)

Steps
Step 1: Pick an old stool or chair and remove the seat so that a bare frame remains.
Step 2: Choose the yarn that you want to use. Keep in mind that it must be a sturdy thread that does not stretch because we will put a lot of tension on it while weaving. In this example, we use eco-cotton macramé yarn of 2.2-millimeter thickness.
Step 3: Start by measuring the number of threads that will fit around the seat. To do this, take a ruler to measure the number of threads per centimeter. Now you are going to draw the design of the seat. Use the graph paper to draw your weaving pattern.
Tip from Steve:
“You can find many ideas for weaving patterns online, in weaving books, or from your own imagination. When weaving, the threads cross each other at right angles. Threads pass above and below each other (this is called a binding), creating a pattern. Colour the squares with the colour that will be visible on top.”

Step 4: Start in one corner of the seat. Use the staples tagger to attach the end of the thread to the frame (you leave the thread on the bobbin), do this on the inside so that the attachment is no longer visible. Wrap the thread around the frame. Make sure that there is always enough tension on the wire and that the wires connect properly. If you want to change colours, cut the thread and tie it to the new thread at the bottom or staple both threads to the frame. Repeat the wrapping until the entire horizontal side of the seat is full of threads.


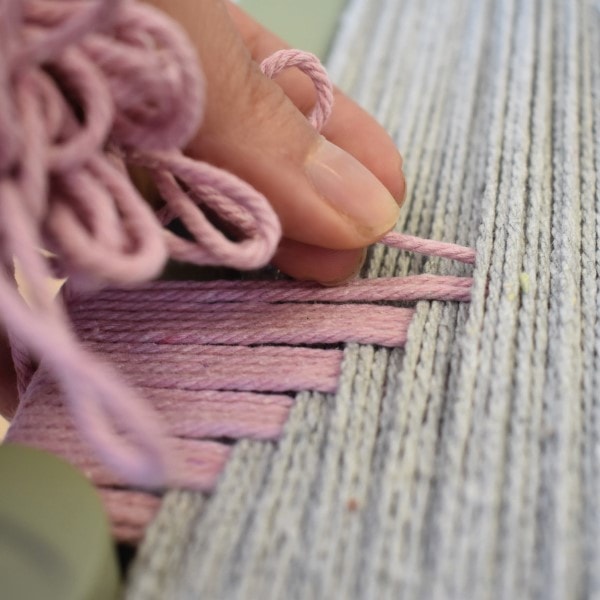
Step 5: When the horizontal side of the seat is full, you can start with the vertical side. This is where the weaving comes in, so grab your design sketch. Count how many threads you eventually used in the horizontal side, you might need to adjust your weaving pattern. Start on the left and go step by step to the right while weaving the pattern with vertical threads into the horizontal threads. Because the seat is already full of threads and the yarn bobbin is too big to pass through, it’s easier to cut a piece of thread from the bobbin. You can use a heddle bar to wind the thread, if you don’t have it you can manually take the threads through.
Tips from Steve:
- When weaving, always make sure you use all horizontal threads. The horizontal threads tend to cross over each other because they are so close together, or sometimes you miss one. So always check carefully!
- When you have a pattern with many intersections, the thread doesn’t always keep straight. To solve this, you can use a weaving comb or pin to push the threads in the right direction.
- During the whole process it’s important to keep the threads at the same tension, the tighter they are, the firmer the seat will become.


Step 6: When you completed your weaving pattern, fix the thread at the end. Do this by stapling it or tying it at the bottom.


Your design stool or chair is ready, sit back, relax and share your design piece with us via Instagram or Facebook!


